
Oracle Hyperion 11.1.2.3 Virtual Environment
The basic idea is this:
- Download all the required software
- Create a virtual Oracle Linux instance using Oracle Virtual Box.
- Copy downloaded software from step 1 to virtual instance
- Run custom buildEPMvirt script to build the environment
The steps above will give you a canned set of scripts to flawlessly, easily create an virtual Oracle EPM / Hyperion virutal environment. All of the hard work is done for you: analyzing requirements, OS administration, database administration, EPM installation and configuration, solving issues, and testing!
EPMVirt - What do you get?
EPMVirt is a process for creating a Virtual Environment for Hyperion / Oracle EPM. After completing the installation process detailed here you will have:Oracle Hyperion 11.1.2.3.0
- Foundation Services
- Calculation Manager
- Hyperion Planning
- Essbase Administrative Services (EAS)
- Essbase
- Essbase Integration Services
- Essbase Provider Services (APS/Smartview)
- Financial Reporting / Workspace
- FDM Enterprise Edition (FDMEE)
- Disclosure Management
- Profitability and Cost Management
Oracle RDBMS 12.1.0.1.0
What is coming? As Oracle matures in the Linux realm, I may provide HFM and EPMA in future 11.1.2.4 releases. Also, I will provide a 11.1.2.3.500 release shortly.
Environment Details
Links:
Workspace: http://epmvirt:9000/workspace/index.jsp
EAS Console: http://epmvirt:9000/easconsole/console.html
Note: There are a number of java security settings which can block EAS console over the web. You can alternatively run it locally using X11 forwarding with:
curl http://epmvirt:9000/easconsole/easconsole.jnlp -o /tmp/easconsole.jnlp
/u0/Oracle/Middleware/jdk160_35/bin/javaws /tmp/easconsole.jnlp
Hyperion admin user, password=password
Linux users:
oracle , password=oracle
root, password=EPMVirt
oracle , password=oracle
root, password=EPMVirt
WebLogic user: epm_admin, password=epm_admin
Database:
SID: HYPDB
Port: 1521
Passwords: PWD
DB Accounts:
EPM_HSS - Shared Services/Foundation
EPM_RA - Reporting and Analysis
EPM_CALC - Calculation Manager
EPM_HPSYS - Planning System Database
EPM_HPAPP1 - Empty schema for creating planning application
EPM_ESTUDIO - Essbase Studio
EPM_EAS - Essbase Administration Studio
EPM_PROFIT - Profitability
EPM_FDMEE - FDM Enterprise Edition
EPM_DISC - Disclosure Management
Before You Start: Requirements
Before beginning, you will need- 50 gigs of hard disk space. This can be provided by using local storage, or an external USB device. 40G will be used for Virtual Image, 10G used as space as temp space for downloaded files.
- 8 Gigs of RAM ( min 5 Gigs given to VM)
- Any 64-bit operating system which is supported by Oracle Virtual Box. I have only tried on Windows, but Mac and Linux should be supported.
Step 1: Download Required Software
ETA for this step: 2 hours (waiting for downloads to complete)
Note regarding software downloads. You are responsible for potential licensing requirements for any of the software. The script buildEPMVirt simply automates the installation of the software. You are responsible for downloading and accepting the Oracle license agreements.
- Download Virtual Box for your OS
https://www.virtualbox.org/wiki/Downloads
Specifically I am using VirtualBox 4.3.18 for Windows hosts - Download Oracle Linux 6.5
Using the Oracle Software Delivery Cloud,
https://edelivery.oracle.com/linux
Select Oracle Linux and 64-bit options
Choose Oracle Linux 6 Update 5
Download this file:Oracle Linux Release 6 Update 5 for x86_64 (64 Bit) V41362-01 3.7G - Create a new folder called vm_files to separate from the previous downloads
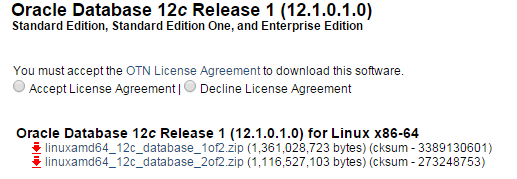
- Download Oracle Database 12c into the vm_files folder
Go to the Oracle 12c Download page. Download Standard Edition 12.1.0.1.0.
http://www.oracle.com/technetwork/database/enterprise-edition/downloads/database12c-linux-download-1959253.html
The two files should be
linuxamd64_12c_database_1of2.zip
linuxamd64_12c_database_2of2.zip - Go to Oracle Software Delivery Cloud
https://edelivery.oracle.com/
Choose "Enterprise Performance Management"
Linux x86-64
Choose 11.1.2.3.0 Media Pack
Download Part 1-7 into the vm_files folder
Step 1 is completed.
Step 2: Create Virtual Image
ETA for this step: 45 minutes (Configuring and Installing VM)
This step will provide the framework for the EPM virtual instance. To start we will install the Oracle VirtualBox software. (https://www.virtualbox.org)
Part a) Install Oracle Virtual Box
Double click on the Virtual Box installer which was downloaded.
Click on Next...


Chose Yes, acknowledging that your internet connection may be briefly disrupted.

Click Install.

Select Finish to open VirtualBox.
Virtual Box home screen:

Select "New" to create a new Virtual Machine.
Under the name field, chose any name for your new Virtual Machine
Choose Linux for Type and Version Oracle 64 Bit.
Note: You may not see 64 bit as an option if vitalization is not turned on in your BIOS. See below for instructions on how to fix.

SPECIAL NOTE: If 64 bit is not showing up as an option you need to enable Virtualization technology in your computer's BIOS.

The following link may explain this in more detail. Without 64 bit enabled, none of the steps in this tutorial will work due to incompatible architecture.

Chose "Do not add a virtual hard drive." and hit "create"

Accept the warning message by selecting Continue

The creation is complete, the settings are now displayed in the home screen,

Let's adjust a few settings. First create a hard drive:
Click Settings, Select storage.

Right Click on Controller: SATA. Click Add Hard Disk

Select "Create new Disk"

Hit next to select the default disk option (VDI).

For best performance, and to avoid pesky "disk full" errors. Select Fixed Size for the disk size.

Enter 40GB for the disk size:

Select "Create" to finish adding the disk. It will take a while to format the disk.
Next, Under "Network" Change the "Attached to" field from NAT to Bridged Adapter. This will allow the Virtual Machine to connect to the internet for pulling rpm packages during install.

Under "System" , select processor. Move the scroll bar under Processor to select more than 1 CPU. 2 will work. More will result in faster performance.

Select OK to finish adjusting settings.
Finally, we will be pushing the limits of the memory on your system. By default Oracle Virtual Box does not pre-allocate RAM and will halt the virtual machine prematurly when memory is low. We want to prevent this by pre-allocating all the memory used in the VM when the VM starts up. The following setting should be run on your machine, open a cmd prompt (for windows) and run:
"C:\Program Files\Oracle\VirtualBox\vboxmanage" setextradata "epmvirt" VBoxInternal/RamPreAlloc 1
** where epmvirt is the name of your virtual machine
Part b) Install Linux on the Virtual Machine
Click "Start" to start the VM:

A new window will pop up containing the Virtual Machine. There is no boot image yet so it will not do anything useful. Select CD/DVD devices. Chose a virtual CD/DVD disk file...
Quick Tip for Oracle VM: When you click inside the virtual machine's window your mouse and keyboard will maintain focus inside the virtual window. To release the focus and switch back to working on your computer, hit the RIGHT CTRL key.

Choose the ISO image for Oracle Linux that was downloaded in the previous download step.
Now that the virtual DVD installation media is inserted into the virtual machine, reboot to have it boot from the Oracle Linux installation media.

Quickly... on to the next step and hit the TAB key!
When the Oracle Linux installer splash screen opens press the Tab key to provide additional options.

At the end of the line add the text:
ks=http://interopconsulting.com/ks1
to specify the automated Linux install script.
(full line will read vmlinuz initrd=initrd.img ks=http://interopconsulting.com/ks1)

Press enter to boot the Linux installer and begin the automated install.
The following automated process will occur:
- Linux installer boots, establishes a network connection and downloads ks1 Linux kickstart script
- The ks1 script specifies the list of RPM packages to install automatically.
- A post installation script will run after packages are installed to download and install the custom EPMVirt RPM Package. EPMVirt is a set of scripts required to install and configure the Oracle EPM environment. This RPM is downloaded and installed automatically. For reference, the RPM is available at:
http://sourceforge.net/projects/epmvirt
Once logged in type:
ifconfig
Determine the IP of the machine, for instance 192.168.1.82

Open a cmd prompt as administrator:
Click on the Windows Start Menu, type "cmd" into the search bar.
Right click on the cmd.exe icon, select "Run as administrator"

In the cmd prompt window type
echo 192.168.1.82 epmvirt >> drivers\etc\hosts

This will now associate the name epmvirt with your new virtual machine's ip address.
For instance, referencing the URL from your laptop
http://epmvirt:19000/workspace would now be possible.
Step 3: Copy the Downloads to the Virtual Machine
ETA for this step: 45 minutes (waiting for files to copy)In this step, we copy the files you downloaded in Step 1 over to the Virtual Machine for installation. Specifically, the files in vm_files directory will be copied to the virutal machine.Using winscp, http://winscp.net/eng/index.php
Login to the Virtual Machine using the internet address noted in step 2.
The password for the user oracle is oracle.

On the left hand pane (your machine) navigate to your vm_files folder where you stored the downloads. The vm_files folder should not include the Oracle Virtual Box or Oracle Linux files.

On the right hand pane navigate to the Unix folder in oracle's home directory, downloads
(ie, /home/oracle/downloads)
Drag the downloaded files from the left hand pane to the right to begin the copy.

Step 4: The buildEPMvirt script
ETA for this step: 5 hours (automated install of Oracle EPM)
This automated script does most of the work. The following are the high level steps:
- Extracts the files in /u0/install/downloads
- Performs an unattended/silent install of Oracle Database
- Creates a database instance HYPDB and create schemas...etc for Hyperion
- Performs an unattended/silent install of Oracle EPM
- Performs an unattended/silent configuration of Oracle EPM
- Starts Oracle EPM
Kicking off the buildEPMvirt script
This process will take a few hours and should not be interrupted. Please make sure to do this at a time when you can kick off the script and let it run without putting your computer to sleep...etc.
Login via PUTTY to the virtual machine, epmvirt, as 'oracle' user. The password is also 'oracle'.
at the Linux prompt, enter:
buildEPMvirt
buildEPMvirt
Sit back and relax. This process will take a while, but rest assured it is much faster than doing it yourself! After the script runs, you are finished and should have a complete Oracle EPM environment.
Sample Output
Archive: /u0/install/downloads/V37933-01.zip
inflating: /u0/install/epm/InstallTool.properties
inflating: /u0/install/epm/installTool.lang
inflating: /u0/install/epm/setup.jar
creating: /u0/install/epm/assemblies/
creating: /u0/install/epm/assemblies/biplus_workspace_new_webapp/
creating: /u0/install/epm/assemblies/biplus_workspace_new_webapp/11.1.2.0/
creating: /u0/install/epm/assemblies/ocm/
creating: /u0/install/epm/assemblies/ocm/11.1.2.0/
creating: /u0/install/epm/assemblies/oracle_common/
creating: /u0/install/epm/assemblies/oracle_common/11.1.2.0/
creating: /u0/install/epm/assemblies/sharedServices/
creating: /u0/install/epm/assemblies/sharedServices/11.1.2.0/
creating: /u0/install/epm/assemblies/staticContent/
creating: /u0/install/epm/assemblies/staticContent/11.1.2.0/
creating: /u0/install/epm/assemblies/tools/
creating: /u0/install/epm/assemblies/tools/11.1.2.0/
inflating: /u0/install/epm/assemblies/biplus_workspace_new_webapp/11.1.2.0/assembly.dat
inflating: /u0/install/epm/assemblies/ocm/11.1.2.0/assembly.dat
inflating: /u0/install/epm/assemblies/oracle_common/11.1.2.0/assembly.dat
inflating: /u0/install/epm/assemblies/sharedServices/11.1.2.0/assembly.dat
inflating: /u0/install/epm/assemblies/staticContent/11.1.2.0/assembly.dat
inflating: /u0/install/epm/assemblies/tools/11.1.2.0/assembly.dat
creating: /u0/install/epm/appdev_patchset/
creating: /u0/install/epm/appdev_patchset/Disk1/
creating: /u0/install/epm/appdev_patchset/Disk1/doc/
creating: /u0/install/epm/appdev_patchset/Disk1/doc/dcommon/
creating: /u0/install/epm/appdev_patchset/Disk1/doc/dcommon/css/
creating: /u0/install/epm/appdev_patchset/Disk1/doc/dcommon/gifs/
creating: /u0/install/epm/appdev_patchset/Disk1/doc/dcommon/html/
creating: /u0/install/epm/appdev_patchset/Disk1/doc/images/
creating: /u0/install/epm/appdev_patchset/Disk1/doc/online_help/
creating: /u0/install/epm/appdev_patchset/Disk1/doc/online_help.bi/
creating: /u0/install/epm/appdev_patchset/Disk1/doc/online_help.bi/biesg/
creating: /u0/install/epm/appdev_patchset/Disk1/doc/online_help/aiaag/
creating: /u0/install/epm/appdev_patchset/Disk1/doc/online_help/asadm/
creating: /u0/install/epm/appdev_patchset/Disk1/doc/online_help/asper/
creating: /u0/install/epm/appdev_patchset/Disk1/doc/online_help/astda/
creating: /u0/install/epm/appdev_patchset/Disk1/doc/online_help/csmsp/
.....
Found /u0/install/downloads/linuxamd64_12c_database_2of2.zip
Starting Oracle Universal Installer...
Checking Temp space: must be greater than 500 MB. Actual 30094 MB Passed
Checking swap space: must be greater than 150 MB. Actual 5135 MB Passed
Preparing to launch Oracle Universal Installer from /tmp/OraInstall2014-10-27_11-48-21PM. Please wait ...[WARNING] [INS-13014] Target environment does not meet some optional requirements.
CAUSE: Some of the optional prerequisites are not met. See logs for details. /tmp/OraInstall2014-10-27_11-48-21PM/installActions2014-10-27_11-48-21PM.log
ACTION: Identify the list of failed prerequisite checks from the log: /tmp/OraInstall2014-10-27_11-48-21PM/installActions2014-10-27_11-48-21PM.log. Then either from the log file or from installation manual find the appropriate configuration to meet the prerequisites and fix it manually.
You can find the log of this install session at:
/u0/app/oraInventory/logs/installActions2014-10-27_11-48-21PM.log
Prepare in progress.
.................................................. 9% Done.
Prepare successful.
Copy files in progress.
.................................................. 15% Done.
.................................................. 20% Done.
.................................................. 25% Done.
.................................................. 30% Done.
.................................................. 35% Done.
.................................................. 40% Done.
.................................................. 45% Done.
.................................................. 50% Done.
.................................................. 55% Done.
.................................................. 60% Done.
.................................................. 65% Done.
.................................................. 70% Done.
.................................................. 75% Done.
.................................................. 80% Done.
Copy files successful.
Link binaries in progress.
Link binaries successful.
Setup files in progress.
........................................
Setup files successful.
.................................................. 86% Done.
Setup Inventory in progress.
Setup Inventory successful.
..........
Finish Setup in progress.
.................................................. 94% Done.
Finish Setup successful.
The installation of Oracle Database 12c was successful.
Please check '/u0/app/oraInventory/logs/silentInstall2014-10-27_11-48-21PM.log' for more details.
As a root user, execute the following script(s):
1. /u0/app/oraInventory/orainstRoot.sh
2. /u0/app/oracle/product/12.1.0/dbhome_1/root.sh
.................................................. 100% Done.
Successfully Setup Software.
Check /u0/app/oracle/product/12.1.0/dbhome_1/install/root_localhost.localdomain_2014-10-28_00-06-41.log for the output of root script
Changing permissions of /u0/app/oraInventory.
Adding read,write permissions for group.
Removing read,write,execute permissions for world.
Changing groupname of /u0/app/oraInventory to dba.
The execution of the script is complete.
SQL*Plus: Release 12.1.0.1.0 Production on Tue Oct 28 00:06:43 2014
Copyright (c) 1982, 2013, Oracle. All rights reserved.
Connected to an idle instance.
SQL> ORACLE instance started.
Total System Global Area 1369579520 bytes
Fixed Size 2288200 bytes
Variable Size 1241515448 bytes
Database Buffers 117440512 bytes
Redo Buffers 8335360 bytes
SQL>
File created.
SQL> Disconnected from Oracle Database 12c Release 12.1.0.1.0 - 64bit Production
SQL*Plus: Release 12.1.0.1.0 Production on Tue Oct 28 00:09:42 2014
Copyright (c) 1982, 2013, Oracle. All rights reserved.
Connected to:
Oracle Database 12c Release 12.1.0.1.0 - 64bit Production
SQL> 2 3 4 5 6 7 8 9 10 11 12 13 14 15 16 17 18 19 20 21 22 23
Database created.
SQL> SQL>
Session altered.
Session altered.
....
Oracle Database 12c Release 12.1.0.1.0 - 64bit Production
SQL> Disconnected from Oracle Database 12c Release 12.1.0.1.0 - 64bit Production
Installer Path check... Ok
Checking if running under root account... Ok
Current user is not root.
EPMINS-01087: Checking if the file exist and have read permissions: /u0/install/epm/assemblies... Ok
EPMINS-01087: Checking if the file exist and have read permissions: /u0/install/epm/jre... Ok
EPMINS-01087: Checking if the file exist and have read permissions: /u0/install/epm/setup.jar... Ok
Check assemblies:
/u0/install/epm/assemblies/biplus_product_reporting_client... Not exists
/u0/install/epm/assemblies/staticContent/11.1.2.0/assembly.dat... Ok
/u0/install/epm/assemblies/webLogicCommonComponent/11.1.2.0/assembly.dat... Ok
/u0/install/epm/assemblies/dbclient64... Not exists
/u0/install/epm/assemblies/aif/11.1.2.0/assembly.dat... Ok
/u0/install/epm/assemblies/ocm/11.1.2.0/assembly.dat... Ok
/u0/install/epm/assemblies/calc/11.1.2.0/assembly.dat... Ok
/u0/install/epm/assemblies/opmn/11.1.2.0/assembly.dat... Ok
/u0/install/epm/assemblies/bpm_architect_datasync/11.1.2.0/assembly.dat... Ok
/u0/install/epm/assemblies/essbase_services/11.1.2.0/assembly.dat... Ok
/u0/install/epm/assemblies/biplus_interactive_reporting_services/11.1.2.0/assembly.dat... Ok
/u0/install/epm/assemblies/bpm_architect_batch_client/11.1.2.0/assembly.dat... Ok
/u0/install/epm/assemblies/hsf_server... Not exists
/u0/install/epm/assemblies/tools/11.1.2.0/assembly.dat... Ok
/u0/install/epm/assemblies/productCommonComponents/11.1.2.0/assembly.dat... Ok
/u0/install/epm/assemblies/hpm/11.1.2.0/assembly.dat... Ok
/u0/install/epm/assemblies/bpm_architect_webapp/11.1.2.0/assembly.dat... Ok
/u0/install/epm/assemblies/biplus_product_reporting_common/11.1.2.0/assembly.dat... Ok
/u0/install/epm/assemblies/dbclient32... Not exists
/u0/install/epm/assemblies/fdm... Not exists
/u0/install/epm/assemblies/biplus_financial_reporting_common/11.1.2.0/assembly.dat... Ok
/u0/install/epm/assemblies/arm/11.1.2.0/assembly.dat... Ok
/u0/install/epm/assemblies/biplus_financial_reporting_webapp/11.1.2.0/assembly.dat... Ok
/u0/install/epm/assemblies/biplus_webanalysis_webapp/11.1.2.0/assembly.dat... Ok
/u0/install/epm/assemblies/biplus_workspace_webapp/11.1.2.0/assembly.dat... Ok
/u0/install/epm/assemblies/ohs... Not exists
/u0/install/epm/assemblies/hfm_client/11.1.2.0/assembly.dat... Ok
/u0/install/epm/assemblies/sharedServices/11.1.2.0/assembly.dat... Ok
/u0/install/epm/assemblies/odi/11.1.2.0/assembly.dat... Ok
/u0/install/epm/assemblies/biplus_portlets_webapp/11.1.2.0/assembly.dat... Ok
/u0/install/epm/assemblies/biplus_core_services/11.1.2.0/assembly.dat... Ok
/u0/install/epm/assemblies/commonComponents/11.1.2.0/assembly.dat... Ok
/u0/install/epm/assemblies/essbaseProductCommonComponents/11.1.2.0/assembly.dat... Ok
/u0/install/epm/assemblies/essbase_studio_services/11.1.2.0/assembly.dat... Ok
/u0/install/epm/assemblies/oracle_common/11.1.2.0/assembly.dat... Ok
/u0/install/epm/assemblies/hfm_common/11.1.2.0/assembly.dat... Ok
/u0/install/epm/assemblies/analytic_services_provider_webapp/11.1.2.0/assembly.dat... Ok
/u0/install/epm/assemblies/planning/11.1.2.0/assembly.dat... Ok
/u0/install/epm/assemblies/biplus_product_reporting_services/11.1.2.0/assembly.dat... Ok
/u0/install/epm/assemblies/financial_close/11.1.2.0/assembly.dat... Ok
/u0/install/epm/assemblies/hsf_webapp... Not exists
/u0/install/epm/assemblies/disclosure/11.1.2.0/assembly.dat... Ok
/u0/install/epm/assemblies/bpm_architect_services... Not exists
/u0/install/epm/assemblies/hfm_services... Not exists
/u0/install/epm/assemblies/hfm_webapp/11.1.2.0/assembly.dat... Ok
/u0/install/epm/assemblies/essbase_integration_services/11.1.2.0/assembly.dat... Ok
/u0/install/epm/assemblies/biplus_workspace_new_webapp/11.1.2.0/assembly.dat... Ok
/u0/install/epm/assemblies/essbase_administration_services_webapp/11.1.2.0/assembly.dat... Ok
Result of checking assemblies: Ok
Checking environment variables...
EPMINS-01056: Could not set the environment variable TMP.
EPMINS-01056: Could not set the environment variable TMPDIR.
Environment variable /tmp would be used.
Ok
EPMINS-01087: Checking if the file exist and have read permissions: /home/oracle...
Ok
EPMINS-01099: User home have to exist for successful installation.
EPMINS-01002: All installation prerequisites have been met. Starting EPM System Installer.
EPMINS-01032: Checking for available disk space in the /u0/Oracle/Middleware/EPMSystem11R1 directory.
EPMINS-01033: The selected components require 9882 MB free disk space.
EPMINS-01034: You have 24335 MB free disk space.
Extracting files...
Installing Database...
DB Connection OK!
Installing EPM...
Installing...
Running preconfig checks...
Running EPM_ORACLE_HOME...
EPM_ORACLE_HOME environment variable value: /u0/Oracle/Middleware/EPMSystem11R1
JAVA_HOME environment variable value: /u0/Oracle/Middleware/EPMSystem11R1/../jdk160_35
EPM_ORACLE_HOME succeeded
Running .oracle.products ... .oracle.products succeeded
Running Jars manifest ...
Time spent for manifests parsing: 299 ms
Maximum jars depth achieved: 6, while restriction was: unrestricted
Parsed 450 manifests
Total jars and classpath entries encountered: 450
Total not-existing referenced classpath entries count: 44
Total classpath elements to check: 57
Jars manifest succeeded
Jars manifest succeeded
Environment variables succeeded
Preconfig checks passed! Proceeding further
Starting all
Apache Ant version 1.7.1 compiled on June 27 2008
Buildfile: /u0/Oracle/Middleware/EPMSystem11R1/common/config/11.1.2.0/resources/instance/start.xml
Finish all
EPM Install OK.
EPM Install Component Count OK.
Configuring EPM...
EPM Config OK...
Starting EPM...
Installation Complete!
All Finished!
To find details regarding your new environment, check intro section above.
I am curious what you think of this process. Please feel free to comment and add feedback on this post.
This can be accomplished by anyone who's recorded a silent install and silent config file as both the installtool and configtool will perform silent installs. It is a good way to quickly redeploy, provided you have all your install files still accessible by the server.
ReplyDeleteTrue, it is based on automated installs for Linux, Oracle DB, and Oracle EPM. It is geared more towards people looking to save time who do not want to fuss with details of the installation. For instance, getting a quick demo environment for a presentation or trying out a new version of the software.
ReplyDeleteHi Nick,
ReplyDeleteGreat post .. I was trying this installation but get stuck while linux installation itself .. the prompt says unable to find ks1 script .. the internet connection seem sto be working fine in the VM .. not sure what is causing the issue .. any help is much appreciated here ..
Thanks,
Dev
Hi Nick
ReplyDeleteMy install seems to get stuck on
EPMINS-01087: Checking if the file exist and have read permissions: /home/oracle...
Ok
EPMINS-01099: User home have to exist for successful installation.
EPMINS-01002: All installation prerequisites have been met. Starting EPM System Installer.
EPMINS-01032: Checking for available disk space in the /u0/Oracle/Middleware/EPMSystem11R1 directory.
EPMINS-01033: The selected components require 10642 MB free disk space.
EPMINS-01034: You have 26195 MB free disk space.
appears to be hanging for more than 12 hours at this point.
tks Russell
Excellent instructions but I have two issues:
ReplyDelete1) I experienced an error in the install which I don't know if it's fatal or not: "Unable to acquire deployment lock for /u0/Oracle/Middleware/EPMSystem11R1/ccr/inventory/pending/scripts.jar."
2) For noobs like me, how do I start and shut down the services?